Maple Pumpkin Crumb Muffins: Easy Bakery-Style Recipe for Beginners

Learn how to make the best maple pumpkin crumb muffins from scratch. This easy homemade pumpkin muffin recipe features a buttery streusel and sweet maple glaze.
Table of Contents
Maple Pumpkin Crumb Muffins: The Ultimate Bakery-Style Recipe for Beginners
If you have ever entered a coffee shop and admired those huge and soft muffins, covered by a glass dome, you know what I mean. You wish you could make those delicious baked goods in the comfort of your own kitchen without getting out of your pyjamas.
The good news is that you don’t have to be a master baker to bake amazing things at home. All you need is a decent recipe and some ingredients.
In this article, I will show you how to make Maple Pumpkin Crumb Muffins which are very moist and flavorful.
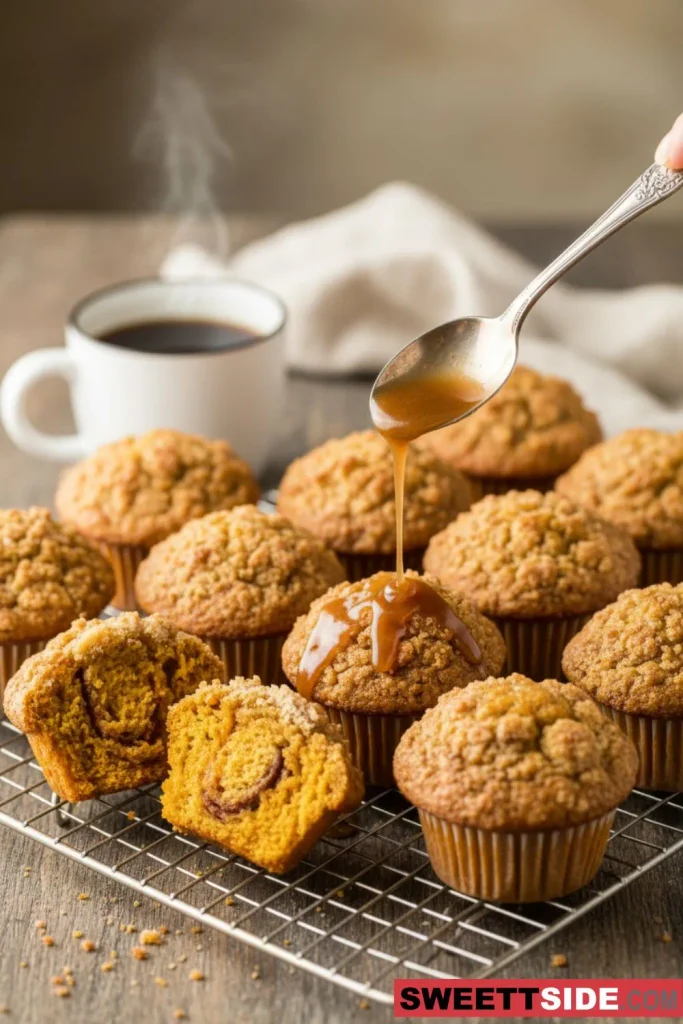
What we are going to make here is a very soft pumpkin-based cake, topped with buttery crumbles and sweetened with a touch of maple glaze.
Why These Are The Best Homemade Pumpkin Muffins
Perhaps you may wonder why these are better than simply buying yourself a box mix. But the difference is like day and night.
Box mixes tend to be rather flavorless and have a strange, spongy texture. Homemade pumpkin muffins allow you to adjust both the level of moisture and the amount of spice to your liking. They could be as dense and moist as you want them to be.
This particular recipe for pumpkin muffins is unique due to the use of maple syrup. Pumpkin and maple syrup are a great combination. The maple syrup adds a whole new dimension to the sweetness of the dish, which regular sugar cannot deliver. It brings a warm earthiness to the dish.
Oh, and what about that crumb topping? It is not an option! It provides the perfect crunch and buttery texture contrasting the softness of the muffins themselves..
Ingredients You Will Need
Before we start mixing, let’s make sure you have everything ready. For beginners, the key is to have your ingredients at room temperature. This helps everything mix together smoothly.
Here is what you need for the muffin batter:
- Flour: All-purpose flour works best. It gives structure without being too heavy.
- Pumpkin Puree: Make sure you buy 100% pure pumpkin, not pumpkin pie filling. The pie filling has sugar and spices already added, which will throw off your recipe.
- Maple Syrup: Use real maple syrup, not pancake syrup. The flavor is worth it.
- Sugar: A mix of brown sugar and white sugar. The brown sugar adds moisture.
- Oil: Vegetable or canola oil. Oil makes muffins incredibly moist. Butter can make them dry out faster.
- Eggs: Two large eggs to bind everything together.
- Spices: Cinnamon, nutmeg, ginger, and cloves. Or you can use a pre-made pumpkin pie spice blend.
For the crumb topping:
- Butter: Cold, unsalted butter. Cold butter is crucial for getting that crumbly texture.
- Flour: Again, all-purpose.
- Brown Sugar: For sweetness and that molasses flavor.
- Cinnamon: A little extra spice in the topping.
For the maple glaze:
- Powdered Sugar: Also known as confectioner’s sugar.
- Maple Syrup: More real maple syrup.
- Milk: Just a splash to get the right consistency.
Pro Tip: Do not overmix your batter. If you mix it too much, the muffins will turn out tough and chewy instead of soft and tender. Mix until the flour is just incorporated.
Step-by-Step: How to Make Maple Pumpkin Crumb Muffins
Alright, let’s get into the nitty-gritty. This Maple Pumpkin Muffins recipe is straightforward, but following the steps in order makes a big difference.
Step 1: Prep Your Equipment
Preheat your oven to 425°F (220°C) first thing. This high heat is a trick of the baker. It gives the muffins a quick blast of heat, which helps them rise tall and domed.
Grease muffin tin or line with paper liners; If you want tall muffins, you can spray the tops of the liners and the top of the pan to help the tops rise up instead of out.
Step 2: Make the Crumb Topping
You should always make the topping first. This way, it is ready to go as soon as the batter is mixed.
In a medium bowl, whisk together the flour, brown sugar, and cinnamon. Cut the cold butter into small cubes. Add the butter to the flour mixture.
Use your fingers, a pastry cutter, or two forks to blend the butter into the flour. You want to stop when the mixture looks like coarse crumbs. There should be no large chunks of butter left, but you don’t want it to be a paste either.
Put this bowl in the fridge while you make the batter. Keeping it cold ensures the crumble stays crispy on top of the muffin.
Step 3: Mix the Dry Ingredients
In a large bowl, whisk together your flour, baking soda, baking powder, salt, and spices.
Why baking soda and powder? Baking soda reacts with the acidity in the pumpkin and brown sugar to help the muffins rise. Baking powder provides a backup lift. Using both ensures a fluffy muffin.
Set this bowl aside.
Step 4: Mix the Wet Ingredients
In a separate medium bowl, combine the pumpkin puree, eggs, oil, maple syrup, brown sugar, and white sugar.
Whisk this mixture vigorously until it is completely smooth. You do not want any streaks of egg or lumps of pumpkin. It should look glossy and consistent.
Step 5: Combine Wet and Dry
Pour the wet ingredients into the bowl with the dry ingredients.
Here is the important part: Fold the ingredients together gently with a spatula or a wooden spoon. Stop stirring the moment you no longer see white streaks of flour. A few small lumps are totally fine.
Step 6: Assemble and Bake
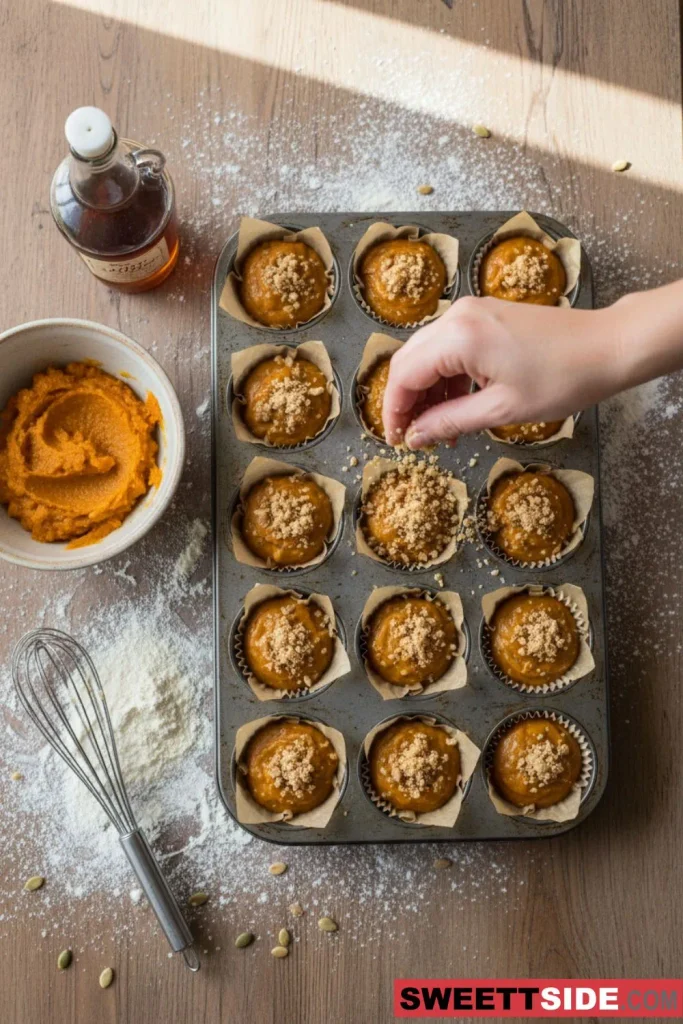
Divide the batter evenly among your muffin cups. You want each cup to be almost full. These muffins rise significantly.
Take your crumb topping out of the fridge. Sprinkle it generously over the top of each muffin. Gently press the crumbs down slightly so they stick to the batter.
Bake at 425°F for 5 minutes. Then, without opening the oven door, lower the temperature to 350°F (175°C) and bake for another 15 to 18 minutes.
The high heat creates the rise, and the lower heat cooks the inside without burning the crumb topping. A toothpick inserted into the center should come out clean.
Step 7: The Maple Glaze
Let the muffins cool in the pan for 5 minutes, then transfer them to a wire rack.
While they cool, whisk together the powdered sugar, maple syrup, and milk. Start with a small amount of milk and add more until you get a thick but pourable consistency. You want it to ribbon off the whisk.
Once the muffins are warm (but not hot), drizzle the glaze over the top with a spoon or a piping bag.
Tips for the Perfect Bakery-Style Texture
If you want your bakery-style pumpkin muffins to look like they came from a professional shop, keep these tips in mind.
Do not over-bake.
The biggest mistake beginners make is baking muffins until they are bone dry. Pumpkin adds a lot of moisture, but it is still possible to dry them out. Start checking them at the 15-minute mark.
Use a Cookie Scoop.
For even baking and uniform size, use an ice cream scoop to portion the batter into the tin. It keeps things clean and ensures every muffin is the same size.
Toss Your Pumpkin.
If your pumpkin puree looks watery, blot it with a paper towel. Too much moisture can make the muffins sink in the middle.
Note: If you are using a dark metal muffin pan, your muffins might bake faster. Reduce the temperature by 25 degrees or check them a few minutes earlier to prevent the bottoms from burning.
Variations and Substitutions
You can stick to the recipe as written, but feel free to make it your own.
- Add Nuts: Chopped pecans or walnuts are fantastic in the crumb topping. They add a great crunch.
- Chocolate Lovers: Add semi-sweet chocolate chips to the batter. Pumpkin and chocolate are a surprisingly great combo.
- Gluten-Free: You can swap the all-purpose flour for a 1-to-1 gluten-free baking blend. Just make sure it contains xanthan gum.
- Different Glaze: If you do not have maple syrup for the glaze, a simple cream cheese glaze works well too.
Storing and Freezing Your Muffins
These muffins keep well, which makes them great for meal prep or making ahead of time.
Storing:
Keep them in an airtight container at room temperature for up to 3 days. If you live in a humid climate, you might want to store them in the fridge to keep the crumb topping from getting mushy.
Freezing:
These freeze beautifully. Wait until the muffins are completely cool. If you are glazing them, it is best to freeze them before adding the glaze.
Wrap each muffin individually in plastic wrap, then put them in a freezer bag. They will last for up to 3 months. When you are ready to eat, just let them thaw on the counter. You can pop them in the microwave for 20 seconds to get that fresh-from-the-oven feel back.
Frequently Asked Questions
Can I use pumpkin pie filling instead of puree?
No. Pumpkin pie filling has added sugar and spices. If you use it, your muffins will be overly sweet and the spice profile will be off. Stick to 100% pure pumpkin.
Why did my crumb topping sink?
This usually happens if the batter is too thin or if the crumb topping is too warm. Make sure your batter is thick and your topping is cold from the fridge before putting it in the oven.
Can I make these as mini muffins?
Yes. Mini muffins are adorable. Just adjust the baking time. Bake at 350°F for about 10 to 12 minutes. Keep an eye on them so they do not burn.
How do I know when they are done?
The classic test is sticking a toothpick in the center. If it comes out clean or with just a few moist crumbs, they are done. If there is wet batter on it, they need more time.
Wrapping Up
Baking Maple Pumpkin Crumb Muffins is definitely one of the most delightful things one can do to make sure the seasonal flavors reach their highest point.
Regardless of whether you are a total beginner at baking or an expert chef, the recipe will not let you down because the resulting muffins will be as good as those in any coffee shop.
Therefore, put on your apron, and start filling the kitchen with the lovely smell of spices and baked goods. You will love these.